Like Geeks Python GUI Examples using Uiutil
This is a copy of https://likegeeks.com/python-gui-examples-tkinter-tutorial/ rewritten to use uiutil. Uiutil uses ttk where possible, not tk.
Create your first GUI application
First, we will import uiutils package, create a window and set its title:
from uiutil import BaseFrame, standalone

standalone(frame=BaseFrame,
           title="Welcome to UI Util app")
The result will be like this:
Python GUI examples create app Awesome!! Our application just works.
The call to standalone creates the frame, adds it to a window, sizes the window and starts the mainloop. The window will wait for any user interaction till we close it.
Create a Label widget
from uiutil import BaseFrame, standalone, Label
class MyFrame(BaseFrame):
def __init__(self,
**kwargs):
super(MyFrame, self).__init__(**kwargs)
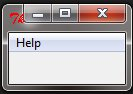
Label(text="Hello")
standalone(frame=MyFrame,
title="Welcome to UI Util app")
There’s a bit of boiler plate required here to subclass BaseFrame. Adding the Label is as easy as creating an instance.
And this is the result:
There’s no need to specify the frame or call the grid function. It’s done for you. Just add the text.
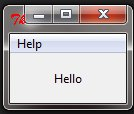
Set label font size
You can set the label font so you can make it bigger and maybe bold. You can also change the font style.
To do so, you can pass the font parameter like this:
Label(text="Hello", font=("Arial Bold", 50))
The font parameter can be passed to any widget to change its font, not only Labels.
Note
TTK prefers styles over parameters passed this way. (We’ll get to that later)
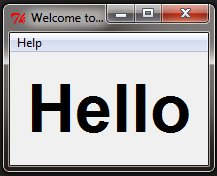
Great, but the window is so small, we can even see the title, what about setting the window size?
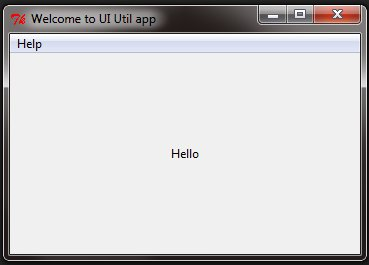
Setting window size
The window will re-size automatically to accommodate the content, but not the title. If you really want to see that title, you can specify the window dimensions in the call to standalone:
standalone(frame=MyFrame,
           title="Welcome to UI Util app",
           width=350,
           height=200)
The above line sets the window width to 350 pixels and the height to 200 pixels.
Let’s try adding more GUI widgets like buttons and see how to handle button click event.
Adding a button widget
Let’s start by adding the button to the window. The button is created and added in the same way as the label:
Button(text="Click Me",
       column=Position.Next)
Note
We also need to add Button and Position to our list of
imports from uiutil:
Our code now looks like this:
from uiutil import BaseFrame, standalone, Label, Button, Position


class MyFrame(BaseFrame):
    def __init__(self,
                 **kwargs):
        super(MyFrame, self).__init__(**kwargs)
        Label(text="Hello")

        Button(text="Click Me",
               column=Position.NEXT)


standalone(frame=MyFrame,
           title="Welcome to UI Util app")
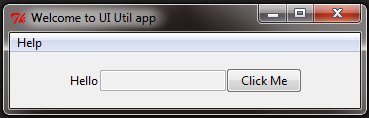
And the result looks like this:
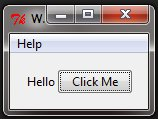
Note
that we place the button on the next column of the window. If you forget and place the button on the same column, it will show the button only, since the button will be on the top of the label.
Change button foreground and background colours
We need to get into styles a bit here, which the likegeeks tutorial doesn’t need to do.
Add a style to the Frame:
ORANGE_RED_BUTTON = "OrangeRedButton.TButton"
STYLES = {ORANGE_RED_BUTTON: dict(foreground="red",
                                  background="orange")}
This needs to be a name ending in .TButton.
We can add foreground and background colours to the style,
and use it to style the Button:
Button(text="Click Me",
       column=Position.NEXT,
       style=self.ORANGE_RED_BUTTON)
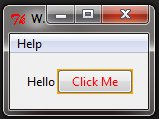
If you try to click on the button, nothing happens because the click event of the button isn’t written yet.
Handle button click event
We’re going to change the Label text when we click the button.
First, we’ll store a reference for the Label so that we can
access it later, and because we want to change its value,
set value instead of just text.:
self.label = Label(value="Hello")
Now we’ll write the function that we need to execute when the button is clicked. This isn’t a call to configure in uiutil, it’s an assignment to the Label’s value property:
def clicked(self):
    self.label.value = "Button was clicked !"
Then we will wire it with the button by specifying the function like this:
Button(text="Click Me",
       column=Position.NEXT,
       command=self.clicked)
Note
that we used clicked only not clicked()
with parentheses. That’s because we’re telling it what
to run.
Now the full code will be like this:
from uiutil import BaseFrame, standalone, Label, Button
from uiutil.tk_names import HORIZONTAL


class MyFrame(BaseFrame):

    def __init__(self,
                 **kwargs):
        super(MyFrame, self).__init__(layout=HORIZONTAL,
                                      **kwargs)

        self.label = Label(value="Hello")

        Button(text="Click Me",
               command=self.clicked)

    def clicked(self):
        self.label.value = "Button was clicked!"


standalone(frame=MyFrame,
           title="Welcome to UI Util app",
           width=350)
And when we click the button, the result as expected:
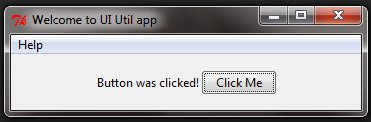
Note
We have some boilerplate for subclassing BaseFrame, but even with just 2 widgets, we’re down to 9 lines of code compared to 11 for the original tutorial. We are also down from 9 calls to 4 calls and an assignment.
Get input using TextEntry widget
- In the previous Python GUI examples, we saw how to add simple widgets,
now let’s try getting the user input using a TextEntry widget:
self.txt = TextEntry()
You can position it in the same way as Labels and Buttons, but we can get the frame to do the layout for us but setting its auto position direction:
AUTO_POSITION = HORIZONTAL
Note
We need a reference to the widget to be able to access it later
Our window will be like this:
from uiutil import BaseFrame, standalone, Label, Button, TextEntry
from uiutil.tk_names import HORIZONTAL


class MyFrame(BaseFrame):

    def __init__(self,
                 **kwargs):
        super(MyFrame, self).__init__(layout=HORIZONTAL,
                                      **kwargs)

        self.label = Label(value="Hello")

        self.text = TextEntry()

        Button(text="Click Me")


standalone(frame=MyFrame,
           title="Welcome to UI Util app")
And the result will be like this:
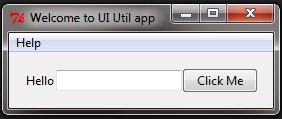
Now, if you click the button, it will show the same old message. What about showing the entered text on the TextEntry widget?
First, you can get the text using its value property. We can write this code to our clicked function like this:
def clicked():
    self.label.value = "Welcome to " + self.txt.value
If you click the button, it will show Welcome to concatenated
with the entered text.
And this is the complete code:
from uiutil import BaseFrame, standalone, Label, Button
from uiutil.tk_names import HORIZONTAL


class MyFrame(BaseFrame):

    def __init__(self,
                 **kwargs):
        super(MyFrame, self).__init__(layout=HORIZONTAL,
                                      **kwargs)

        self.label = Label(value="Hello")

        Button(text="Click Me",
               command=self.clicked)

    def clicked(self):
        self.label.value = "Button was clicked!"


standalone(frame=MyFrame,
           title="Welcome to UI Util app",
           width=350)
Run the above code and check the result:
Python GUI examples entry widget event Awesome!!
Set Focus
Every time we run the code, we need to click on the text entry widget before we can type into it. What about setting the focus automatically?:
self.text = TextEntry(column=Position.NEXT,
                      focus=True)
When you run your code, you will be able to type into the entry field immediately.
Disable entry widget
To disable entry widget, you can set the state property to DISABLED:
from uiutil.tk_names import DISABLED
...
    self.text = TextEntry(state=DISABLED)
Now you won’t be able to enter any text.
Add a combobox widget
To add a combobox widget, you can use the Combobox class like this:
self.combo = Combobox(value=1,
                      values=(1, 2, 3, 4, 5, "Text"))
Note
We can add the possible values and initial value straight away
from uiutil import BaseFrame, standalone, Combobox


class MyFrame(BaseFrame):

    def __init__(self,
                 **kwargs):
        super(MyFrame, self).__init__(**kwargs)

        self.combo = Combobox(value=2,
                              values=(1, 2, 3, 4, 5, "Text"))


standalone(frame=MyFrame,
           title="Welcome to UI Util app")
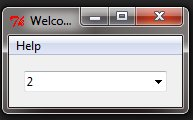
As you can see, we add the combobox items using the values parameter.
You can get the current selection with self.combo.value and set
it like this:
self.combo.value = 2
And if you want to get all of the values,
just use self.combo.values.
By default, a Combobox is select only. You can make it editable like this:
from uiutil.tk_names import NORMAL
...
    self.combo = Combobox(value=1,
                          values=(1, 2, 3, 4, 5, "Text"),
                          enabled_state=NORMAL)
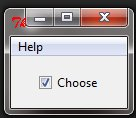
Add a Switch widget (checkbox)
To create a Switch/Checkbox widget, you can use Switch class like this:
self.switch = Switch(text=u'Choose')
It defaults to On/Selected, but can be set to default to Off:
self.switch = Switch(text=u'Choose',
                     state=Switch.OFF)
Set check state of a Switch
You can read or set the state by accessing properties:
# Read
self.switch.switched_on
self.switch.switched_off
self.switch.state

# Set
self.switch.switch_on
self.switch.switch_off
self.switch.state = Switch.ON
self.switch.state = Switch.OFF
self.switch.state = True
self.switch.state = False
We can associate a function to the Switch using the trace
parameter:
from uiutil import BaseFrame, standalone, Switch, Label, Position


class MyFrame(BaseFrame):
    def __init__(self,
                 **kwargs):
        super(MyFrame, self).__init__(**kwargs)

        self.switch = Switch(text="Choose",
                             trace=self.set_label)

        self.label = Label(row=Position.NEXT,
                           value="?")
        self.set_label()

    def set_label(self):
        self.label.value = ("Switch is on"
                            if self.switch.switched_on
                            else "Switch is off")


standalone(frame=MyFrame,
           title="Welcome to UI Util app")
Check the result:
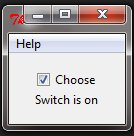
Note
that BooleanVar is used under the hood, as in the likegeeks tutorial. You just don’t need to worry about it. Using IntVar is not an option when using uiutil.
Add a SwitchBox
Rather than set up multiple Switches, you can use uiutil’s SwitchBox widget to set up multiple Switces in one widget:
.. literalinclude :: code/switchbox.py
SwitchBox dictionary switches
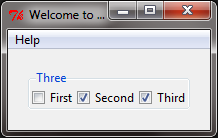
It’s also possible to provide discrete labels and values for the switches by passing a dictionary, to set the states and add associate changes with a command (function):
from uiutil import BaseFrame, standalone, SwitchBox, Label, Position
from uiutil.tk_names import CENTER
class MyFrame(BaseFrame):
def __init__(self,
**kwargs):
super(MyFrame, self).__init__(**kwargs)
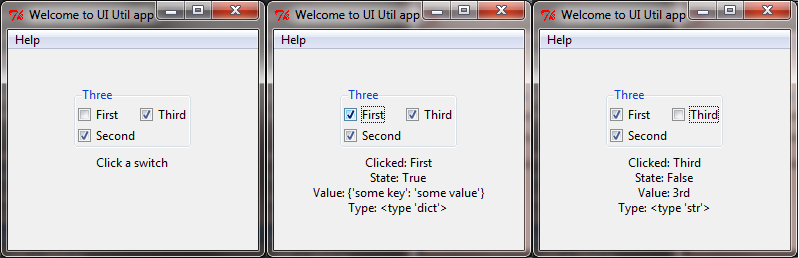
self.switchbox = SwitchBox(title="Three",
switches={"First": {"some key": "some value"},
"Second": 2,
"Third": "3rd"},
switch_states={"First": False},
max_rows=2,
command=self.clicked)
self.label = Label(row=Position.NEXT,
value="Click a switch\n\n\n",
justify=CENTER)
def clicked(self,
switch):
value = self.switchbox.value(switch)
self.label.value = ("Clicked: {selected}\n"
"State: {state}\n"
"Value: {value}\n"
"Type: {typename}"
.format(selected=switch,
value=value,
state=self.switchbox.switch_state(switch),
typename=value.__class__))
standalone(frame=MyFrame,
title="Welcome to UI Util app",
width=250,
height=200)
RadioButton
A RadioButton is added like this:
radio = RadioButton(text="First")
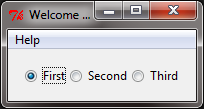
Multiple RadioButtons on a single frame are all associated and while values can be specified, the text can be used instead:
from uiutil import BaseFrame, standalone, RadioButton
from uiutil.tk_names import HORIZONTAL


class MyFrame(BaseFrame):

    def __init__(self,
                 **kwargs):
        super(MyFrame, self).__init__(layout=HORIZONTAL,
                                      **kwargs)

        RadioButton(text="First")

        RadioButton(text="Second")

        RadioButton(text="Third")


standalone(frame=MyFrame,
           title="Welcome to UI Util app")
Also, you can set the command on the first RadioButton to a specific function, so if the user clicks on any one of them, it will run the function
self.radio = RadioButton(text="First", command=clicked)
Get radio button value (selected radio button)
To get the value of the selected radio button like this:
radio.value
Let’s put this together:
from uiutil import BaseFrame, standalone, Label, Position, RadioButton
from uiutil.tk_names import HORIZONTAL


class MyFrame(BaseFrame):

    def __init__(self,
                 **kwargs):
        super(MyFrame, self).__init__(layout=HORIZONTAL,
                                      **kwargs)

        self.radio = RadioButton(text="First",
                                 value="1",
                                 command=self.set_label)

        RadioButton(text="Second",
                    value="2")

        RadioButton(text="Third")

        self.label = Label(row=Position.NEXT,
                           columnspan=3,
                           value="?")
        self.radio.value = "2"
        self.set_label()

    def set_label(self):
        self.label.value = "{value} selected".format(value=self.radio.value)


standalone(frame=MyFrame,
           title="Welcome to UI Util app")
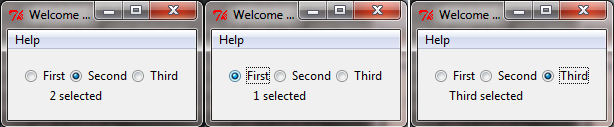
Every time you select a radio button, the widget.value returned by any of the associated radio buttons will be value of the selected radio button.
Note
all values returned are strings. Use IntRadioButton if integer values are required.
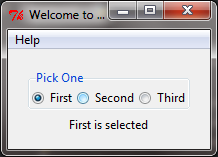
RadioBox (uiutil feature)
Rather than set up multiple RadioButtons, you can use uiutil’s RadioBox widget to set up multiple buttons in one widget:
from uiutil import BaseFrame, standalone, RadioBox, Label, Position


class MyFrame(BaseFrame):
    def __init__(self,
                 **kwargs):
        super(MyFrame, self).__init__(**kwargs)

        self.radiobox = RadioBox(title="Pick One",
                                 options=("First", "Second", "Third"),
                                 command=self.set_label,
                                 max_rows=1)

        self.label = Label(row=Position.NEXT,
                           value="")
        self.set_label()

    def set_label(self):
        self.label.value = ("Selected : {selected}"
                            .format(selected=self.radiobox.selected))


standalone(frame=MyFrame,
           title="Welcome to UI Util app")
RadioBox dict options
It’s also possible to provide different label and values for the options by passing a dictionary.:
RadioBox(title="Pick One",
         options={"First":  {"some key": "some value"},
                  "Second": 2,
                  "Third":  "Third},
         command=self.set_label)
Removing max_rows here has cause the buttons to stack vertically.
The value returned is the object from the options dictionary. In this example, a dictionary for “First” an integer for “Second” and a string is returned for “Third”:
def set_label(self):
    self.label.value = ("Selected: {selected}\n"
                        "Value: {value}\n"
                        "Type: {typename}"
                        .format(selected=self.radiobox.selected,
                                value=self.radiobox.value,
                                typename=self.radiobox.value.__class__))

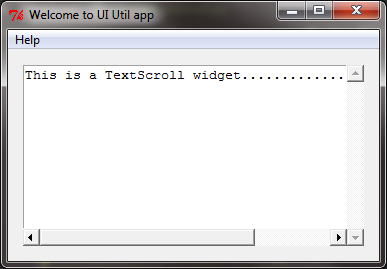
Add a TextScroll widget
To add a TextScroll widget, you can use the TextScroll class like this:
TextScroll()
Here we specify the width and the height of the TextScroll widget:
from uiutil import BaseFrame, standalone, TextScroll
from uiutil.tk_names import INSERT


class MyFrame(BaseFrame):
    def __init__(self,
                 **kwargs):
        super(MyFrame, self).__init__(**kwargs)

        self.text = TextScroll(width=40,
                               height=10)
        self.text.insert(INSERT, "This is a TextScroll widget...........................")


standalone(frame=MyFrame,
           title="Welcome to UI Util app")
The result as you can see:
Set scrolledtext content
To set TextScroll content, you can use the insert method like this:
self.text.insert(INSERT, 'You text goes here')
Delete/Clear scrolledtext content
To clear the contents of a TextScroll widget, you can use delete method like this:
self.text..delete(1.0, END)
Great!!